Showing posts with label speed record. Show all posts

Monday, March 17, 2014

Nickel and diming....

This project has been nickeling and diming me for years on my time but now I figured I should just hammer down and build it because I have the tools to do it...

When I started this concept a few years ago with my brother, I knew I could finish it quickly and it would turn out like the Gravity bike and everyone would get stoked but the more I ran with the concept and split off with my brother the more I realized I was becoming a machinist for stuff but I was still missing the CNC part to really make my parts stand out...

I can machine anything by hand to a point but it often requires special attention on things like finish work because its not a perfect smooth finish but cnc offers you a showcase of the machining effort you have put in to it, its why people love aircraft parts and crazy cnc bicycle and motorcycle parts. Theres something about leaving the raw machine marks all over it and not polishing it to a glass like finish that sometime once anodized looks like plastic...

The more I left it sit on the frame table the more it would bug me looking at it but my customers come first and its not to say that I am short on work, what you see on my blog is about 20% of the projects I can show without getting sued or thrown in jail, so it took the back burner... maybe not even the back burner, maybe almost refrigerator with a cover over it...

The day came where after some sweet wheelin and dealin I scored the CNC Bridgeport Boss 10 and did the retro fit to a brand new drive and PLC ready to take on the most complex jobs, then came the teaming up with Autodesk's new company called HSMworks which links to Solidworks and Inventor for CAM ( see the old blog posts for more details) and with those 2 things the door finally opened on making crazy parts a reality... No paying for machining that I can't afford... I would do it myself and let it run all night on crazy parts.
   This is the project my brother and I came up with to build and I have been running with it since it was sketched... Lots still to come but day by day this thing is coming together....


So come along with my machining adventure in the next weeks to see this beast come to life...

Machining aluminum softjaws to hold a expanding mandrel
plus it makes a perfect origin 0,0 right away after cutting 
I wouldn't call them softjaws really because it would still hurt if you got them thrown at you, but in the machining world anything made of Aluminum is called SOFT... ha, whatever....

These are the hub blanks Liem made on the Lathe using HSMworks Lathe Cam software
As you can see the one side of the hub was done but the other side needed to be hollowed out, plus I wanted disc rotor mounts and because the Haas Lathe we did the work on didn't have live tooling we were stuck doing it this way.
This is the expanding mandrel in my hand
 

Perfect fit ready for the hub.

Here we go... clearing it out with a pocketing cutting feature.
I didn't use a big end mill because I didn't want a lot of cutting pressure to cause it to possible spin or move on the mandrel...
Don't call me a pussy
 

switched over to a long 12mm ball end mill with relief to do this deep cut
Looks great but it was ringing like crazy so I put this wrist band I got from Autodesk University on it to reduce the chatter, perfect!
VIP status...

check that out!!!
With the mounts for the floating rotor!
On to the next parts

Dropouts on this bike are a wild one too, if you scroll up to the 3d model of the bike you will see the crazy machined dropouts so here we go... making chips.
 
cutting away..

I really like the look of ball endmilling the radius in to things and also the radius on these parts varies so theres no way I could use a normal tool

At the end I did a webbing and the part was held in by a few pieces and then I cut it out with a aviation shear... easy and fast and then I made another side in a mirrored image.

Thinking time... Sometimes its easier to draw and look at a part then using crazy modeling software.
I feel that a lot of newer engineers don't understand how important this is... you don't always need to sit and stare at the computer to make parts, go out in the shop and smell the oil.

Surplus Lockheed 6-4 Titanium
Blocks of it ready to become a king pin steering set up for the cable steering front end.
I really freestyled this part, I hope it works...

Roughing Titanium is a learning experience
If you don't machine it a lot it can be very costly if you mess up...
Called up Tom at Ox Tool to make sure I had everything right, hes rattled off the numbers on the phone by memory....
.375 depth of cut - 8 ipm at about 900 RPM with a .120 step over with a 4+ flute endmill 
He knew it... maybe he has done it before....

Side one getting some ball endmilling
and some clean up in the bearing pockets, you will see in the next weeks how this part works. 
it worked out pretty good, have to debur it and do some finish work on it but I think it will work to get the bike on the ground as a roller, just think this could have been some crazy part at Lockheed... but they were going to scrap it so I put some life back in it by making a mini F22 Raptor style steering link part... Kind of like Lockheed Skunkworks around here...
 
I got so excited about aerospace stuff I had to make a cart....
Built this beast in a few hours out of the junk laying in the off cut pile next to the saw
MLS Aerospace division just got a fresh new cart, off to powdercoating.
 

Monday, August 20, 2012

Spinning ......

The last year of work has really slowed down all the fun personal projects around the shop that normally I would be doing, but on the other hand this year has been amazing for working on projects that may and will change the world.

From Meka Robotics crazy prototypes, Google madness, Boeing projects for the new 787 Dreamliner, Clorox Research stuff, USA Government projects, LightSail Energy, All Power Labs Gasifier crazyness, and now RedBull things..... Overall its a year to smile about.

I get a lot of emails asking about my projects and why I take so long building them.... That list above is the reason.... and its also the reason that makes better at what I do and think about things in a new light.

LightSail Energy is a company located in Berkeley and has a crazy green energy project that I have been stoked to help out on, I have been helping out doing some aluminum Tig welding.

The project is very neat in concept -
In a nutshell, its an " air battery"
the system runs off peak hours to compress air when electricty is cheap, then during the day when the grid needs power, the air compressor runs backwards using the stored air to turn it and it becomes an motor to turn the electrical motor which then becomes a generator of electrical power to sell back to the grid during demands.

The neat part is that all that heat generated in the compressor is captured with mists of water which can be used. Its a really rad system and very neat to look at.


I decieded this would be a perfect trade to get some help on one of my projects as a work for work exchange for my welding. The Speed Bike is still waiting on a front hub.....  So one of the machinist over at Lightsail named Liam decieded to help me out for the trade and spin the hub out after hours.

The Haas ST30 CNC lathe is perfect for the job


This is Liam doing all the layout and setup.
This hub is a tricky one....

Just hoggin the profile of the hub

sometimes you do some changes along the way


Spinning the finish profile of the hub on the outside.
Still a lot of weight reduction that needs to happen in the next few machine passes.

This gives you an idea of what the hub looks like and how it mounts

The hub makes some rad chips, which made the " Chip of the Day" in the Lightsail window


Just had to make a video of the prototype hub being made.


                          PedalFest - Oakland, CA  at  Jack London Square
This last weekend was the Oakland Jack London PedalFest
I was given a booth next to Jen at New Belgium Brewrey, so I brought the fleet of machines

There was no way that the WiskeyDrom was going to be there and I wasn't going to ride it.
This is the bike I just did for New Belgium that you will see this week after the photoshoot.

So a challenge went out via text message to Greg Minnaar to come race me....
So he showed up.... ready for the beach with his sandals and beach gear on

World Champ Downhill Mountain biker Greg tried all the bikes.... His lady Laila watching from the stairs leading in to the track.

even the kids little Schwinn from the 1960s

And this thing what ever it is.....
Pedalfest photos by Jon Suzuki

This was built by some guys up in Santa Rosa, CA with the help from New Belgium.
They call it the SpruceDeuce and its can go from land to water for a race located in northern California
Check it out - some good guys Krank Boom Clank

Sunday, January 22, 2012

working working working

OK....

Wasn't expecting to turn MLS in to a T-Shirt factory but it kinda happened the last weeks. Super stoked to see people worldwide making it happen and showing the love. Thanks Everyone, The shirts are boxed and shipping!

I don't mind screen printing and you get a real custom MLS made shirt.
Doing the little green DiAcro Press brakes.

Done - This lucky person will be an investor in the DiAcro press brake as shown on their arm with the little green press brake. Other tools include a blue patternmakers vise, Calipers, Drills, Tig torch and so on. Every shirt is a surprise....

the little green press brake that could...
If you want to buy a shirt and help out heres the link -  To the Buy a T-shirt blog page


Back to the metal shop 

Some times you just need to know when its a good idea to say, " Theres a better way or person to do this job". I had to say it the other day. I was machining out the front hub for the top speed bike on manual lathe and I had it almost done and looked at it and said, this works for a prototype for me to make the front steering but really its not the quality I need for the look to be correct.

If Cane Creek didn't do such a good job making the hubs on the carbon rear wheel maybe my manually made hub would be fine but I really want to show off the machining marks on the outside of the hub. On a completely contoured machined hub with no straight lines its next to impossible to do on a manual machine and leave the raw machined look. This hub is really a pain in the ass to make and I can thank my brother for designing it like that.
I might not be a " True Machinist" to the " OLD Guys " but I still can give them a run for their money.
Doing some hoggin out of the center of the hub. That 7075 Aluminum is a dream to machine if you know what I am talking about. 


The hub is very special as the steering is inside the hub shell in the big pocket.
This hub takes a lot of operation changes to make it happen on a manual lathe or CNC lathe, I took it out after roughing out the rough shape for the photo and to start machining the steel mandrel to hold it in the center bearing bore, so I could do my final profile cuts on the outside of the hub shell. 

Like I said up above, I decided its time to ask for help so I got on the phone and called my buddy Derek over at Moss Machine in San Francisco. Derek is one of those machinist that looks at super crazy prototype stuff and says " OK ". The dude has maybe touched something thats on your high end bicycle in some way, he does a lot of prototype machine work for big companies like Easton and so on.... He said " OK " give me the block of aluminum and come back next week to get it, I owe you anyways for hammering out the stuff for the BRD RedShift bike ( video of Dereks machine shop ).

I finished up some of the last fab on the frame other then the crazy seat mount, it was just making all the stainless steel brackets for the rear dropout aluminum sections to bolt too. There is a Paragon Machine Works belt disconnect in the frame because I figured why not set it up for belt drive... Isn't it suppose to be a futuristic concept bike when chains don't exist on bikes, right ...?

 The tube ends are capped and threaded for the built-in belt tensioning, don't worry you will understand later when you see the rest of the parts...   And thanks to Best Buy telling me I am 2 days over on my extended warrantee on my broken digital camera, I am forced to use my Iphone for photos until I get a new camera... What a buzz kill

see the little seam for the belt disconnect?
This was just before I welded it all up and make it look fancy.... 

Saturday, December 17, 2011

Saturday Night Delight


Theres nothing more peaceful then good music and a welding torch on a Saturday night.....

Its out of the fixture table and ready for welding!

Monday, November 14, 2011

The wheels keep turning.....

This weekend I was working on my Lab style Espresso machine ( post coming this week ) and on the Top Speed Bicycle.

Good weekend of just hammering in the shop on all the projects and keeping the young kids happy teaching welding, by the way I had my youngest TIG student this weekend, 8 years old and I was proud to see him running the torch. Its amazing what kids can do if you get the wheels turning on proper methods and safety!


Friday I picked up the huge block, all 26 pounds of 7075 aluminum to make the front hub for the Top Speed bike. If you look at the 3D model you can see the front steering is inside the hub so it requires the hub to cup over the front steering point on the bike. Its not a big deal except for the fact that I need to start out with a huge 4 3/4 inch round of 7075 aluminum. This grade of aluminum is an amazing grade to machine and makes very light parts out of, but your welding fact for the day is DO NOT weld it, and there is a link why if you have some time to read about welding.

Yep, I used a can of Murry's for a size reference!!
After I am done making the hub I will have a good chunk left of this bar left and the hub will be under a pound   with a huge pile of chips left in the lathe, which to me might as well be my paycheck laying in the machine.

I love my shop, its coming together very nicely
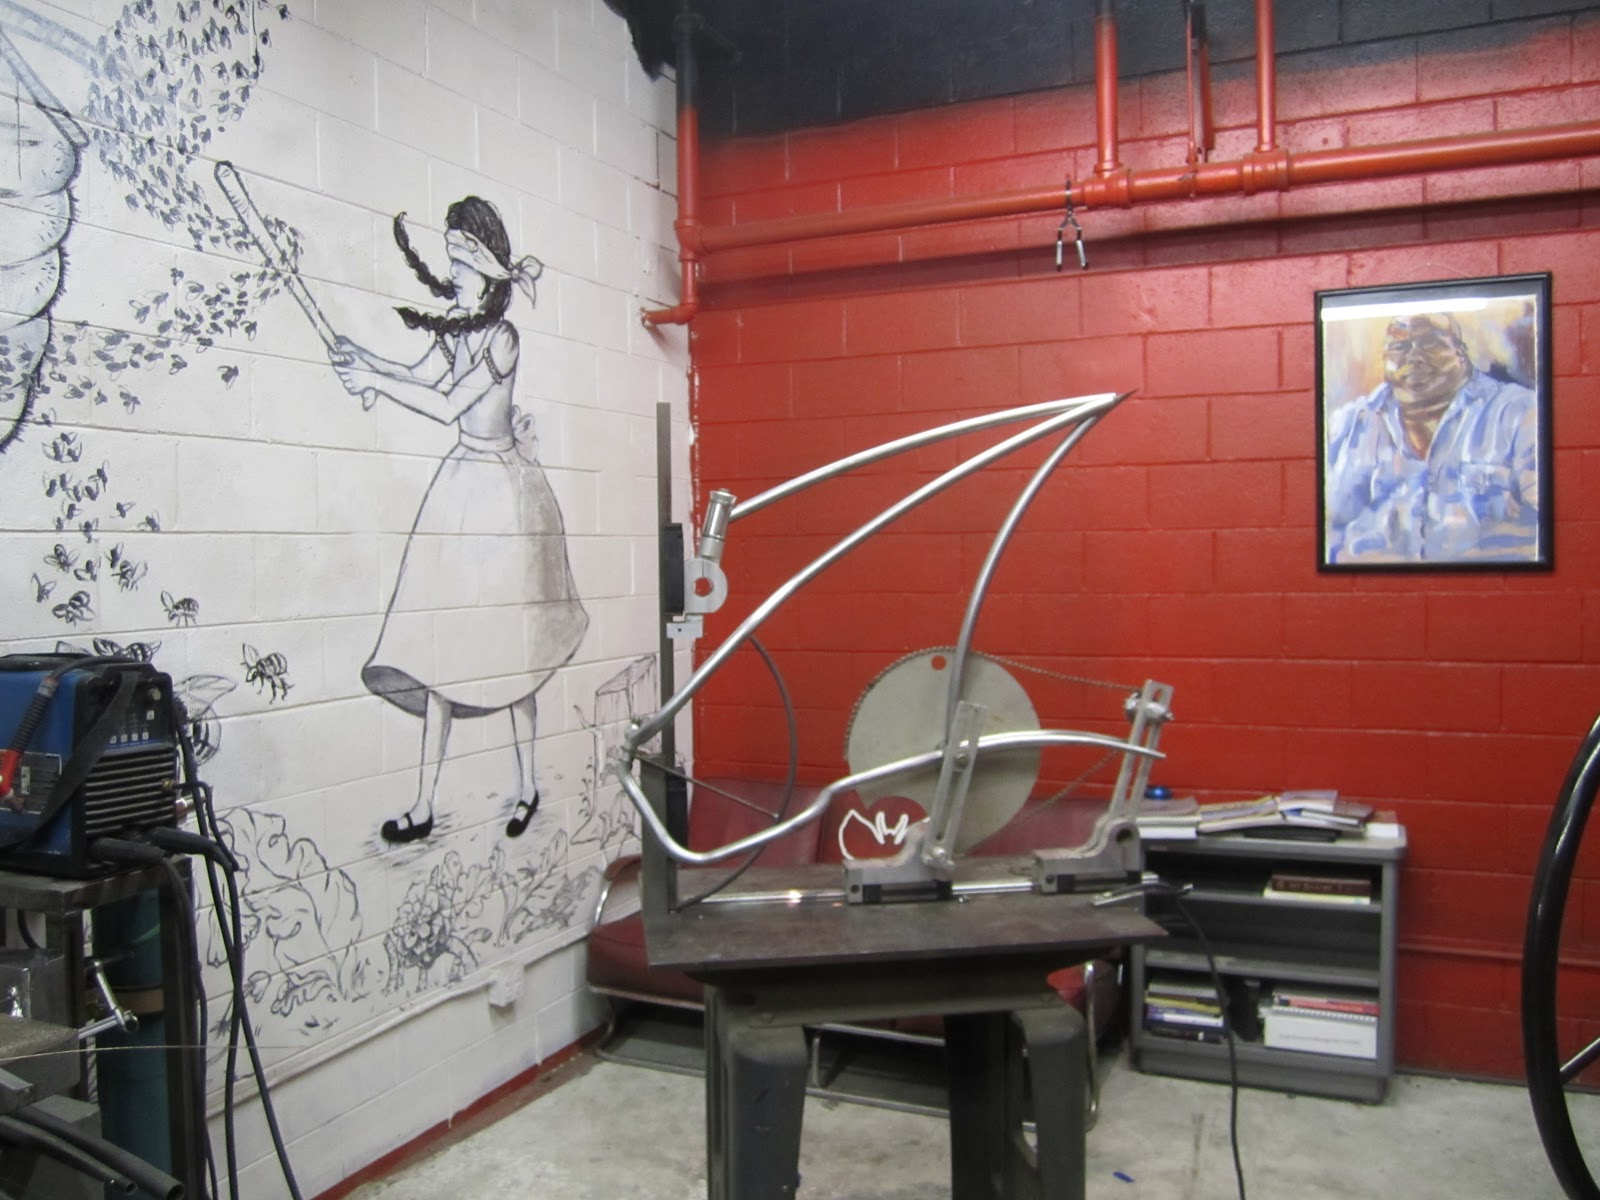
Thats Margaret Holland's Oil Painting of  " Chuck " on the right
Chuck is a living legend in the Santa Cruz, CA area I've heard
She is a really good oil painter and I get to hang it in my shop as inspiration !!!
And on the left is Louise Chen's " Love to Bee Home" painting 

Oh Yeah, the bike is coming along as well, got some 4130 tubes tacked on after 9 hours of making about 15 mistakes trying to put tight bend after tight bend on to rolled tubing ( kids don't do this at home, its not a good idea if you only have one shot to get it right ) 


Wednesday, November 9, 2011

Here we go..... You ready?

100 MPH + on a track bike with no fork?

This project between my brother Jason Tiedeken and I has been on the burner for a while and its time to just hammer it out. I did the mock up of the bike and some of you got a sneak peek of it in the 360 deg view of my shop weeks back but its time to put it on the blog, plus a quick teaser video from Matt Ducot

The vision started about a year or so back when I asked my brother to team up with me to design and build something fun and fast, something that would get people thinking different about the bicycle industry and all the possibilities still out there when it comes to design.

He sent over some sketches for me to think about...


This one of the many 30 second sketch that caught my eye!


In my years of working in the prototype industry, I have got the opportunity to work with some of the most famous designers and engineers but my brother scores in the very top few because of his mad skills of thinking outside of the box as well as being one of the fastest design engineers on a computer, and then being able to walk in to the shop and build it, to put the cherry on top.
He is very highly in demand across many industries for that very reason.

Jason T, my brother and owner dude of Metal Morphosis Engineering threw a quick 3D drawing together of the creature to see what it would look like 
in Solidworks so we could decided the layout. This was a quick drawing to take some of the guess work out of it, there was nothing specific about his drawing to build off of, most of the time this style of 3D modeling is done as a point of concept to clear up any questions before the specific drawings are made and building starts. This is the reason there is no seat, the chainring goes thru the tube and so on, its nothing more then a good way to view your project in a different way then a hand drawing.

My brother's concept was locked down and it was now my job to make it a reality, my brother stepped back and let me do the magic in my Skunkworks shop in Oakland,CA. 

Peter from Cane Creek has always been a believer of anything rolling out of the MLS doors and was quick to join the effort with some sick carbon wheels and AER headset.

Since Cane Creek always helps me out I decided why not do an internal headset using their AER headset,
I decided to make it using a bottom bracket from a BMX frame I was suppose to build for a customer, the BB is the same size bearing bores as an internal headset, the only differences being in the small angle the bearings rest on ( you can see inside the tube), I machined an angle inside for the bearing rests. Kinda cool and it took about 5 minutes to make it work, if your ever looking for great info on machining headtubes for custom projects check out Cane Creek for PDFs they show every dimension need to make all sizes of HTs. 

I did some quick layouts dimensions to set up my frame table
The frame geo is based off of Lance's TT bike.
My frame table I built about 2 years ago was built for this very reason.
TO THINK OUTSIDE OF THE FIXTURE
not to be constrained by the requirements of where to put the tubes, it takes a bit longer to build a frame because you need to be measuring extra, but in the end, your brain has no limits to where you need to be.


I machine out all the parts to save every possible gram...
There did I sound like a roadie?
I machine out the parts just to make sure that later down the road if I need to back purge the frame with argon for better weld quality or if I need to run cables inside the frame I don't have to get ghetto crazy with the frame and do it the wrong way with a long drill bit and some beers.

I know your asking " How do this thing steer"??
good question
These good old "Morse Push Pull Cables" as seen on your dads dragster and boat
This one is for a TOP FUEL dragster hammer shifter from B&M
I havn't lock down all the details with it and the mounting but I had to start somewhere with the concept.


If you going to go over 100 MPH your going to need a big ring, maybe like 90+ tooth
Thats a 52 tooth laying on the table and check out those chainstays.. talk about a pain to make


As of right now this is how far I am.
I built the mock-up bike already to make sure it looked right.
I like it.
Now I am running a orbital sander over all the tubes to clean them and doing the final tacks and cuts on the tubes.

Matt Ducot working on the video teaser
I don't think he wanted me to take the picture?
He made this video so quick and with such little amount of footage, kinda makes me wonder what he would do if he had a lot of footage and way more time. 


                               Monkey Likes Shiny - 100mph + concept track bike
                                                    from Matt Ducot on Vimeo.


Remember tell you mom you seen it first here on MLS, she will be stoked.