About 9 months ago I was approached by the some of the big dogs at Red Bull asking if I would be willing to help design and build the trophy for the America's Cup Youth Race sponsored by Red Bull happening in San Francisco...
A tall order because there is a lot of eyes watching these million dollar plus boats. One of the main reasons I was asked is because I am close to the same age as a lot of the racers, just 2 years older then most of the racers so it would be extra special to have a young person design and build the trophy to really cater to our age group.
Let me give you some background on the racing and Red Bulls involvement in a nutshell.
There is 10 AC45 sail boats with the main sponsor Red Bull funding a lot of boat cost but the racers really have to step up their business game and collect the other sponsors to cover race fees which can be a tall order on itself.
The racers are all 18-24 years old and have to race for the country that they are a resident of, as opposed to the AC72 whose team can be built of racers not of the country they are representing
The MLS in a nutshell decription of the Youth Races is - Its like giving a group of kids Corvette Rental cars and telling them... " its really expensive, don't crash it but don't forget to have fun with it"
One of my first tasks was just to not even think of the classic priceless 100+ year old America's Cup trophy because no matter what I build it will have no way to compete with something like that, so think different and think RED BULL .....
The original America's Cup Trophy
Anyone that knows me knows that one of my main goals in life is teaching the masses.... There is a reason I find myself at the Exploratorium Science museum about 60+ hours a week... I love teaching science and I have found I can do it well working with my hands.
I may not get to build the rocket to go to Mars in my lifetime, but I feel like I might impact the little 10 year old walking in the museum and learning something so interesting and new that they have to learn more, they grow up and become scientist and push the limits resulting in the first foot steps on the Mars surface, maybe I will be alive maybe not but either way I do it for the love.
Thats success to me and I may never know if I achieve it ... even if its a super simple exhibit that I giggle about how simple it is ... It can make a impact, that can last a lifetime...
With that idea in my brain, I have this tool to get peoples attention... A trophy, not just a simple trophy for your uncles bowling reunion, this bad boy is across the TV on ESPN, ABC, NBC and don't forget the good old internet.
So I ask why not use it as a teaching tool, lets show people something they don't know because they have never seen it or maybe from out of town and just visiting San Francisco, just maybe it will be seen by that one kid or adult that realizes they want to know mOre .....
All that goes thru my mind everyday when I build so when I grabbed my sketch pad with the Red Bull crew watching, I said lets make something that shows the Bay and lets make it something that shows so much detail about where this race is happening but is so simple that it makes you scratch your head and say .... I know what it is, and man is that neat... ( or at you can replace " neat " with Rad or KickAss )
Using a piece of sheet metal and a parts bin I did a 5 minute mock up...
I always present this because its always the most photographed way the trophy will be seen so when doing a quick mock up its very important to make sure your happy with the look.
I didn't really stray far from my design... I knew what I wanted to build and it was kinda final, sometimes I really like whats in my head when I am in the right place, about 16 Red Bulls helps get there quicker.
Some people think that because I am a pretty good welder and machinist, that I should be good at drawing... Ha ha ... Damn ... fooled you.... I suck at drawing unless theres a pretty girl around to show off to...
10 minutes or so in each sketch... Proof of concept
Nothing crazy just making the point to draw it as we talk about it.
I know I shouldn't show these drawings because they are not very good but it proves a point it doesn't take a perfect drawing to make good work. More detailed drawings were done after the meeting with Red Bull and these would get sent off for rendering.
Aaron at Red Bull was quick to make the call to his crew up at Roundhouse designs in Portland to do some clean up on my mess of drawings and make it so the main Red Bull crew in Austria had an understanding what we wanted to build... Always gets you pumped when you see your idea in your brain become more of a reality in 3D plus the Roundhouse crew threw a little extra flair on it to put the cherry on the top.
Roundhouse really put together a bunch of good drawings from my sketches
I was so busy working on other concept projects it was a real lifesaver for them to do this part of the project.
With the OK from the crew at Red Bull to build it... The madness started... The stuff Roundhouse did was just a very simple model for selling the idea but now it was time to put it to reality and make some real CAD models we could build off.
Proof of concept I machined and testing the Acrylic on top.
Easy to get your results really quick... Prototyping full speed ahead....
Like normal I hit up Matt Carney the master mind CAD man that hides at either MIT or somewhere in the San Fran area, I knew this one was not something I could tackle by myself because of the layout I knew it would be a costly mistake if it wasn't right. Matt and I watched and researched everything we could find about the San Francisco Bay using Gov. Data and other things, we came up with a very simple idea and how to give it a really smooth look without all the crazy details that over power the eyes...
With the little mini model and many cups of coffee Matt and I hammer out the design.
First we took the Google Image of the bay and made it in to a layered CAD drawing with each layer being 3/8 inches apart and the max layers to stack no higher then 4.5 inches. Next was to lay out how we wanted to machine it and how we would make the layered stack up, in the past doing things like this such as the Red Bull Rampage trophy we stacked layers of laser cut wood and metal and we got the height that way but this one needed to be a bit different.
The laser is almost to precise sometimes, creating sharp aggressive angles that are sometimes not very appealing to the eye when bunched together, it makes you think of things like SPIKE strips that the cops use or something you don't want to hold because your affraid of getting cut, so it became a backup plan to laser cut it if we ran out of time, we decieded it would need to be machined out of a SOLID block of aluminum...
A 110 LB block of Aluminum...
Scrap piece from an aerospace company that didn't need it...
Recycling...
As if my buddy Anthony from HSMWorks / Autodesk ears were burning or something, he called me out of the blue asking whats new.... I said " I am looking at a 110 block of aluminum and thinking about making something with it but I think I want to freestyle machine it on my manual mill because I am old school and I want to know if I can do it and make it look good "
his reply was great - " Oh F#^k NO, what the hell is wrong with you? We are going to make some rooster tail aluminum chip on the CNC mill and run the hell out of one of our new super fast CAM programs and show everyone how easy it is, its 2013 buddy I can't watch you suffer like this"
I had to put a picture of Anthony up here so he could be embarrassed and you could imagine him saying that full excitement over the phone with tons of cussing...
Within about 30 minutes I was doing a online conference call with Anthony and Al one of their top programmer/developers for HSMworks talking about how their new FREE CAM software could tackle this mess of a machining job with about 30 clicks of the mouse and make it look like the most simple task... They were right.... about 30 clicks plus about 700 more in disbelief because I couldn't believe how easy it was compared to the thing we call Master something that I have suffered with for years...
\
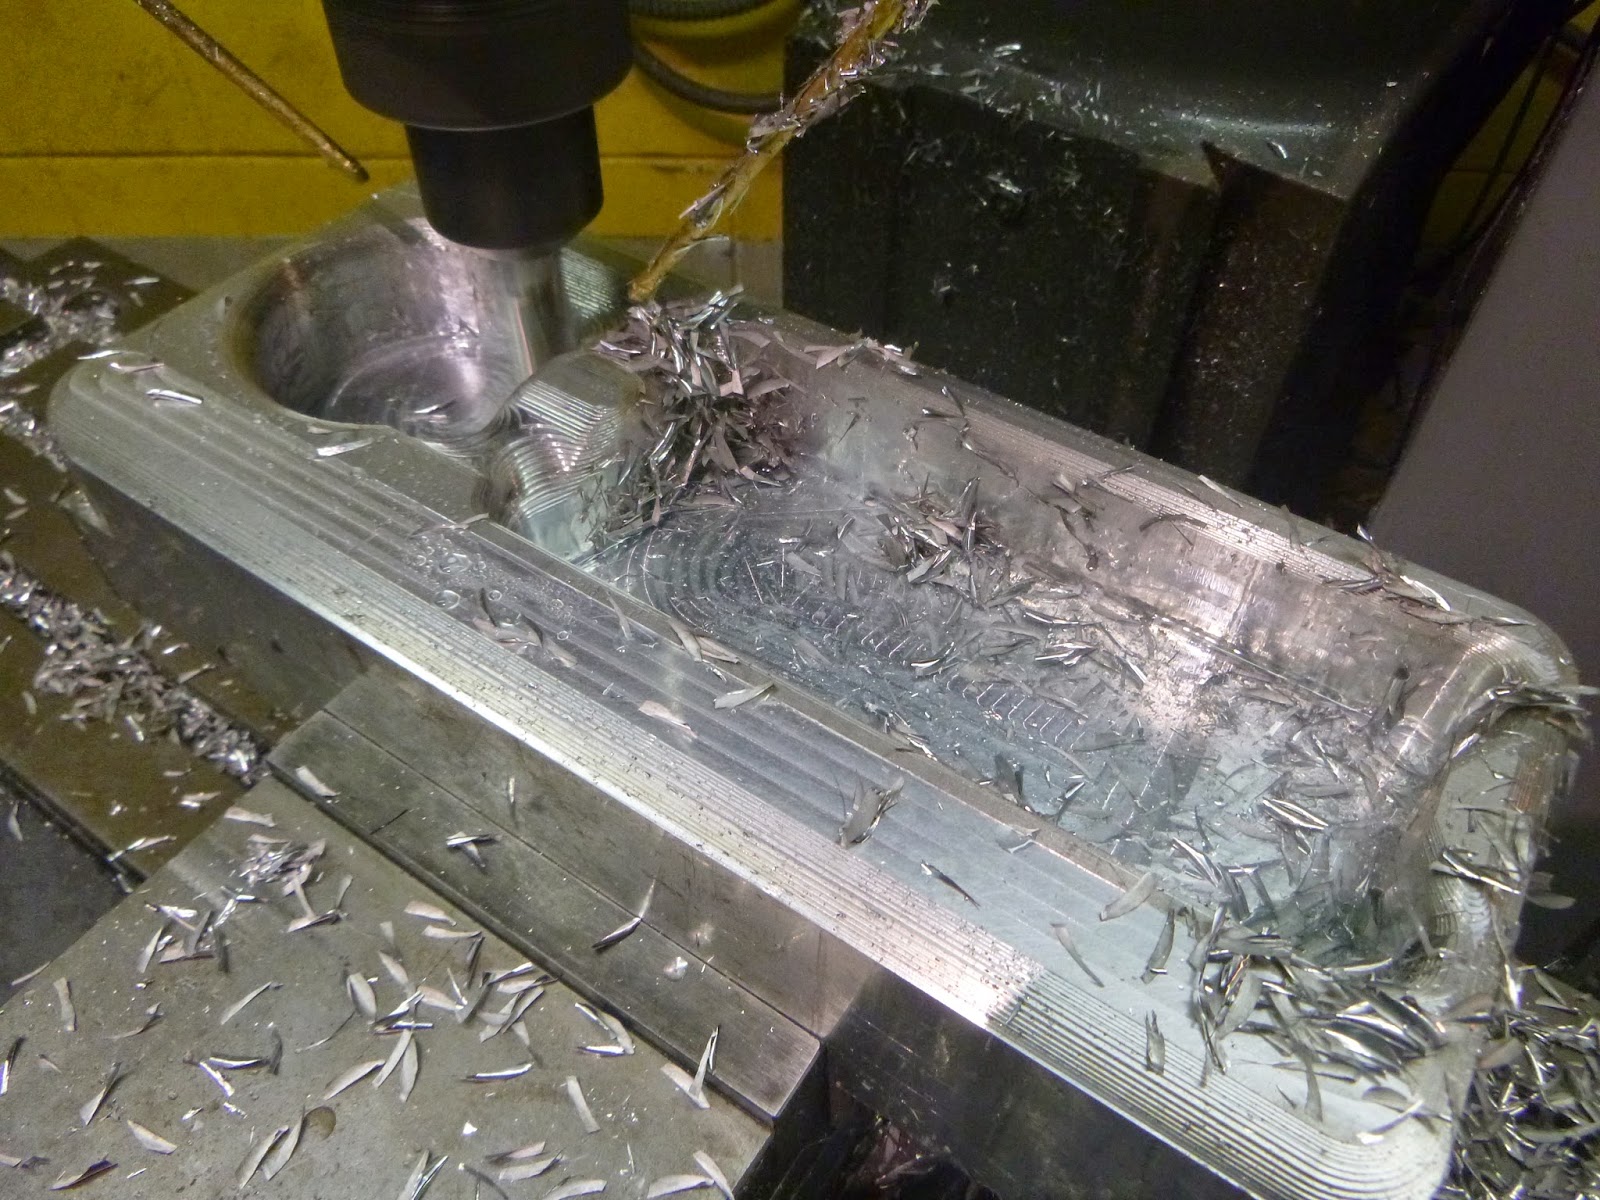
That next day with the help of Liam from LightSail Energy, we loaded the 110 lb block in to the Haas and loaded up the G code we had just made using the HSMworks, next we loaded the tools and the rooster tail aluminum chips started flying minutes later.
Start
milling away..
You get to watch it upside down...
Finish
The next project after the base was done was the mini AC45 wing, this time Matt and I did the drawing and within about an hour of finishing the drawing we had the G code to run it on my Bridgeport CNC in my MLS Skunkworks shop. I hate to sound like a spokes model for the programming software but I am still amazed they are giving it away for free and it does everything so smoothly for Solidworks and for Autodesk Inventor, its worth testing if you CNC machine stuff.
Talking with the HSMworks crew on the phone about dialin in the Bridgeport Boss 10 for the next project which is the wing
running the wing on my new CNC
3D machining the sail - 159,000 lines of code per side
The wing ran on my Bridgeport CNC for a few hours as I slept above in my loft... I am good at sleeping thru a CNC running long cycle times... I dream of $$$$$$$$$$$$$$$$$$$$$ ha ha or the YG*IU*(U*(Y*(YH*YH&AYF&^WT*FY& as the spindle crashes in to the table..... lets hope that one I wake up and realize it was just a dream...
Ladies.... A key Chain model of an AC45 sail
With the main machining parts all done it was back to the crew up at Seaport Stainless who have mastered laser cutting just about anything that you can some how laser thru, Ryan and Jason cut some blue acrylic and a few other parts for the trophy like the compass and the little logo plate for the sail my brother helped me do the layout on, then the other side job was cutting some parts that I offered to build as a volunteer for the non profit group that restored the USS Potomac ( President Roosevelt's "White House on Water" Presidential Yacht )
Jason at Seaport Stainless setting up the laser to cut out blue water plus spares for sandblasting
The next stop was out to ACP Composites in Livermore,CA only to find that they were slammed with work on America's Cup AC72 parts for a few teams, making the lower fins of the boat due to rule changes but seeing the fins all over made me realize these guys are very good and I need to do more carbon stuff, I picked up a few chunks of Carbon to use on the trophy for inserts to add that carbon style to it. That crew out there is some of the best carbon fiber fabricators I have seen, Boeing calls them so I think thats all I have to say.
The main thing is with something of this level of expectations I really love very simple finishes and easy to clean, so all the land was sand blasted and Gabe did the blasting on the land and then I took over finishing off the trophy sandblasting with Ghost Red Bull logos all over it.... Ha ha no one even knows they are there most of the time.... Sneaky...
Then I sent the trophy over to the boys at MetalCo Anodizing in Emeryville because they specialize in Dye-less Anodizing which turns out very different from normal ano and gives it a very smooth and sleek appearance, I use them for a lot of projects. Its not for every project but they do a hell of a job when its the right finish for the job plus they do it quick and sometimes that means the world in the prototyping sector.
You don't even know how stoked they were to know they were doing the anodizing for the trophy plus all the other parts for the big AC72 boats from various teams.
Its really neat to see extra money and fun coming in to the bay area industry because of these races, its kinda like aerospace without the rules... They are like airplanes on the water....
Doing some of the details now... Late nights...
Remember in the early pictures - Holding over your head is one of the most important things...
LOGO HITS = Happy Customers
Carbon Fiber = Everyone is happy
Its very important as well to make sure its facing the right way if they hold it up over their head
Perfect bottom that you will likely never see
I designed and a little compass with San Francisco cut in it...
Details ....
Time to put the wing on it and finish it
proud of it
I got a good team of people that makes it happen!
In exchange for building some stuff for a non-profit group that restored the USS Potomac they took Liam and I out to watch the Red Bull Youth America's Cup race... So rad...
The Potomac was built for President Roosevelt and was called the White House on the Water.
It was later own by Elvis ... And the story goes on... We had it for the afternoon and it was so cool
Cruzin full throttle
President Roosevelt knew whats up with the 2 Chris Craft boats on board, someday I will get one
You can see the racers in the background and the Golden Gate Bridge.
Best parts of making stuff for the Potomac is we got to go down in the engine room while it was full throttle with is only 400 RPM but if your a boat/ship person you know how rad these 1930s vessels are with the crazy wood bearings on the drive shafts.
The bridges are both closed this week causing madness around the bay for driving
The span on the left is being tore down and the new span on the right is ready to replace it starting Tuesday after labor day.
The lead skipper of each team did a quick photo by the trophy for the RBYAC trophy
I was stoked to see it finally ready for someone to hold above their head because they are one of the best sailors in the world...
Enjoy...
The races were really rad with all 10 boats out at the same time. Watch this video and it gives you an idea whats going on.




 Good People