When the phone rings most of the time for rush work there is normally a time line to get the work done like 2+ days or so... Like normal it was Anthony from HSMworks on the phone with the request to design and build a quick trophy to give away at the event the next day for the launch party of Autodesk Inventor HSM 3D ( the intergrated CAD/CAM for designing and then machining parts in the same program).... I just laughed and said " you got to be serious Anthony, you can't call me the day before, your crazy!"
So like normal I said let me give it a shot and lets see what I can kick out by tomorrow....
I really owe HSMworks, Autodesk and NextGen and all the kids tied in a bunch of favors, really when I look back, meeting this crew has truly changed the shape of my business, skills and built a good amount of my reputation in the concept world because of the ability to kick out crazy 3D machined masterpieces in hours not days or weeks, I can't even imagine what I would be doing, who I would know, and where I would be had I not run in to Anthony while filming a TV show in LA, oh yea, plus I stilled owed Anthony like 50 bucks from Autodesk University in Las Vegas when I ran out of money and needed to eat, so I kinda owed him some favors....
With the clock ticking and less then 20 hours to complete.... I started to round up materials at the same time as my brain was trying to process what I was actually going to build.
Here goes nothing....
This was laying on the floor in my shop...
3x6x12 block of aluminum
I did a quick model of the idea in Inventor and did all the tool paths for it
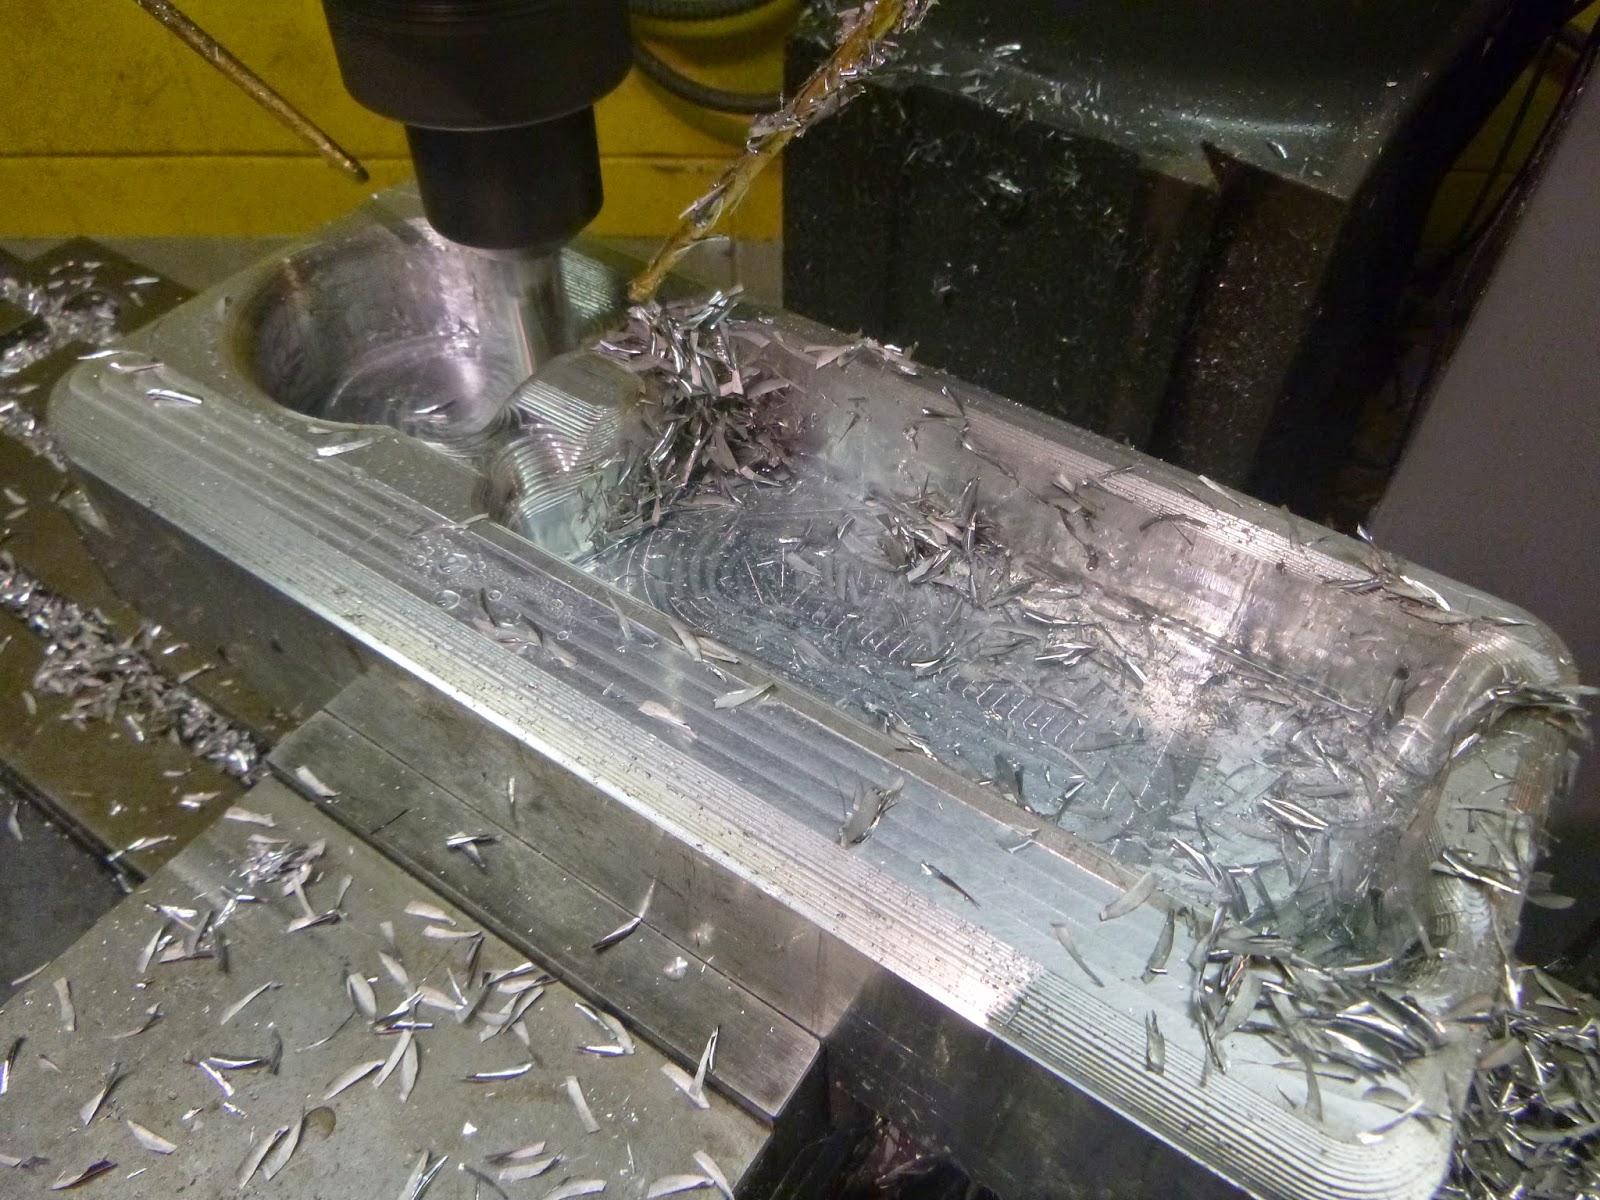
Roughing with a 3ft 3/4 endmill
Making "Roaster Tail chips"
Time for the 1/2 3ft ball endmill and a lot of surfacing
When making a trophy for a contest that involves toolpaths and the idea of machining you know "EVERYONE IS LOOKING AT THE MACHINING"
The flip to side 2... I tried to only have to use 2 tools
My design really could have been done with a 1/2 endmill but I figured to rough it with the 3/4 to save a ton of time.
I used a 4-5-6 block as my stop for side 2
Almost done then on to the other parts.
I like to do all the 3D contouring then make one final pass around the part with a trace to make sure all the faces look perfect.
Because I had no time to make anything special or time to send anything to anodizing and with the event less then 8 hours away, I searched my shop for anything that was black anodized. The only thing I found was... A test piece for Red Bull Rampage trophies, another HSMworks project a few months back around August.
Before I cut out the circle on the backside I engraved the Autodesk logo, I knew that I could keep moving all over the part until I got the logo just right. Once I got the logo just right, I cut it out roughly on the K&T horz. mill and then turned it perfectly round on the lathe.
As you can see the sun is coming up and the event was at 2pm so my time was ticking.
I put the logo in with a .001 press fit and did some locking nicks with a small chisel to really lock it in without any visible hardware or glue. I also put on the little feet that I had laying around from an only Exploratorium project.
I needed some blue Acrylic, then I looked up on the wall and seen a left over piece from the Americas Cup Red Bull's Youth Cup trophy I had used HSMworks on as well about 8 months ago.
Ghetto machinist style I put a 2x4 wood board in the vise on the CNC and made a quick 3D sketch of the cut out it needed to fit, screwed down the oddly shaped piece to the board and cut it out. Quick and dirty
This photo is at about 10:30am... Completely smoked... but it was done..
Truly the software and my drive are the only reasons this thing can get done in that amount of time.
Its a advanced piece of machining you can throw a calipers on and measure if you don't believe me, with a turnaround of less then 15 hours from start to finish...
I arrived at the contest...
3 people that had held the fastest time at Autodesk University in Vegas for doing Cam Mania, a timed contest to see who could cnc program on HSM the fastest. All 3 of these guys happened not to be machinist or even have any background in machining, they all were Autodesk users in someway but not really on the manufacturing side of things. Think that made the story way better!
Then I jumped in on the photo and photo bombed it...
Because I don't care....
Enjoy