This is a photo of a roller press found on the internet.
This machine may be from the late 1800s or so
If only we could cast steel and make cool looking stuff like they use to.
Check out the photos, the project.
It uses a negitive raised image with ink on it, then you lay it on top of the paper, next you put the foam and felt on the top and run it between the big steel drums.
The pressure between the rollers pushes the ink from the negitive image on to the piece of paper below it and your poster is done, then you repeat for the next poster. Its produces a unique print because it is very repeatable but there will be small differences because of the speed you crank it or pressure differences or if more then one color is used there can be all kinds of things different.
The frame of the press was build by Goose and he used the Mig welder to put it all together. He did a good job making everything and doing all the tube notching for the frame. With not much experience behind the welding mask, I helped with a bunch of quick welding tips and he was off welding. He pulled off some good looking welds that will last the life time of the press.
The rollers were a big job because of the size and weight. We decided to buy some giant steel tubes from the steel supply company, the problem was they were really dented and scratched up tubes thats why we got them for cheap. But because the tubing walls were about 1 inch thick there was more then enought material to remove to make them straight. We machined the bars and inside supports for the rollers ( pictured ) and the end caps. I Tig welded the rollers together to help control the heat and not allow the shafts to bend.
Yep, thats a big block of steel
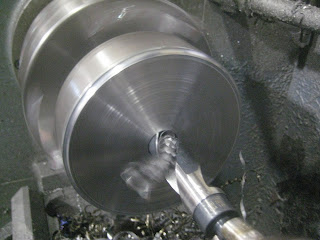
These are start of the internal supports of the rollers.
There is 4 of these per roller at about 20 pounds each
I machined the faces and then drilled the hole for the shaft
Here is the two rollers
Each one is over 100 pounds
and as smooth as silk
The last part was just putting it all together. It kinda fell together, everything was custom built but really planned out.
This is Goose putting the table bearings on and making sure everything is running.
This machine is bigger then the old press pictured above, the rollers can do prints up to 40 inches wide.
Here it is all done with the gear drive, crank, table and below storage
This is a close up of the table
from bottom up
1 inch fiber board
Lexan sheet 3/8 thich
Felt
Foam
The paper and negative image die goes between the Lexan sheet and Felt
Enjoy


No comments:
Post a Comment